# Changing Your Apple Region: A Simple Guide

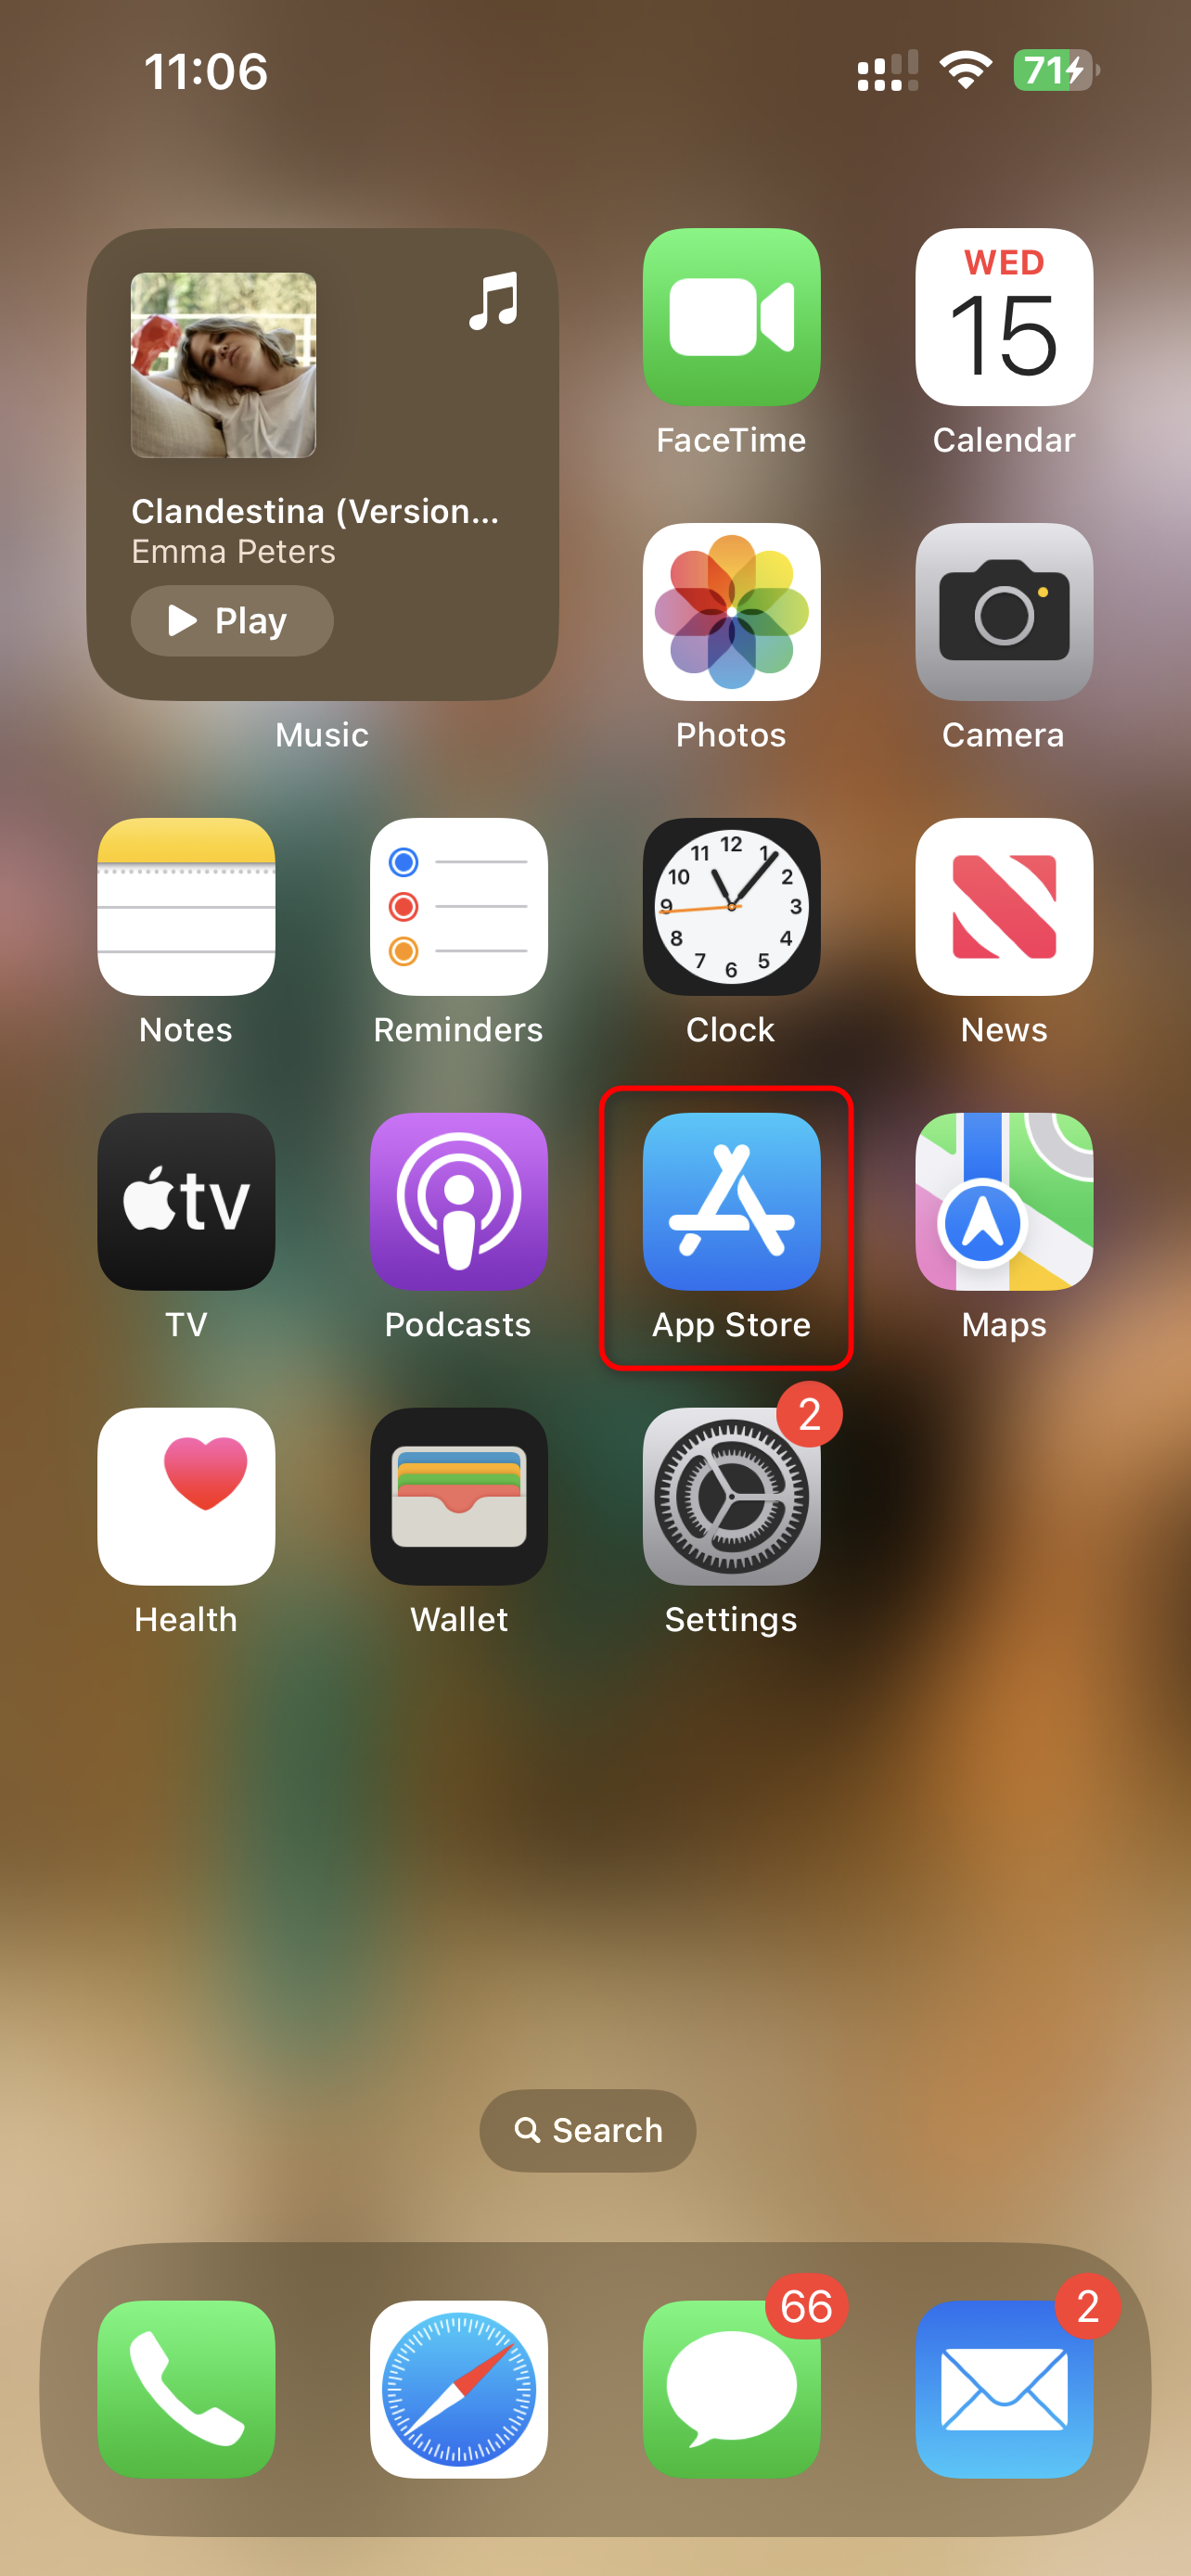
<figure><img src="/files/ix73CvhE2IdBD62bikRv" alt=""><figcaption><p>To begin, launch the App Store application.</p></figcaption></figure>

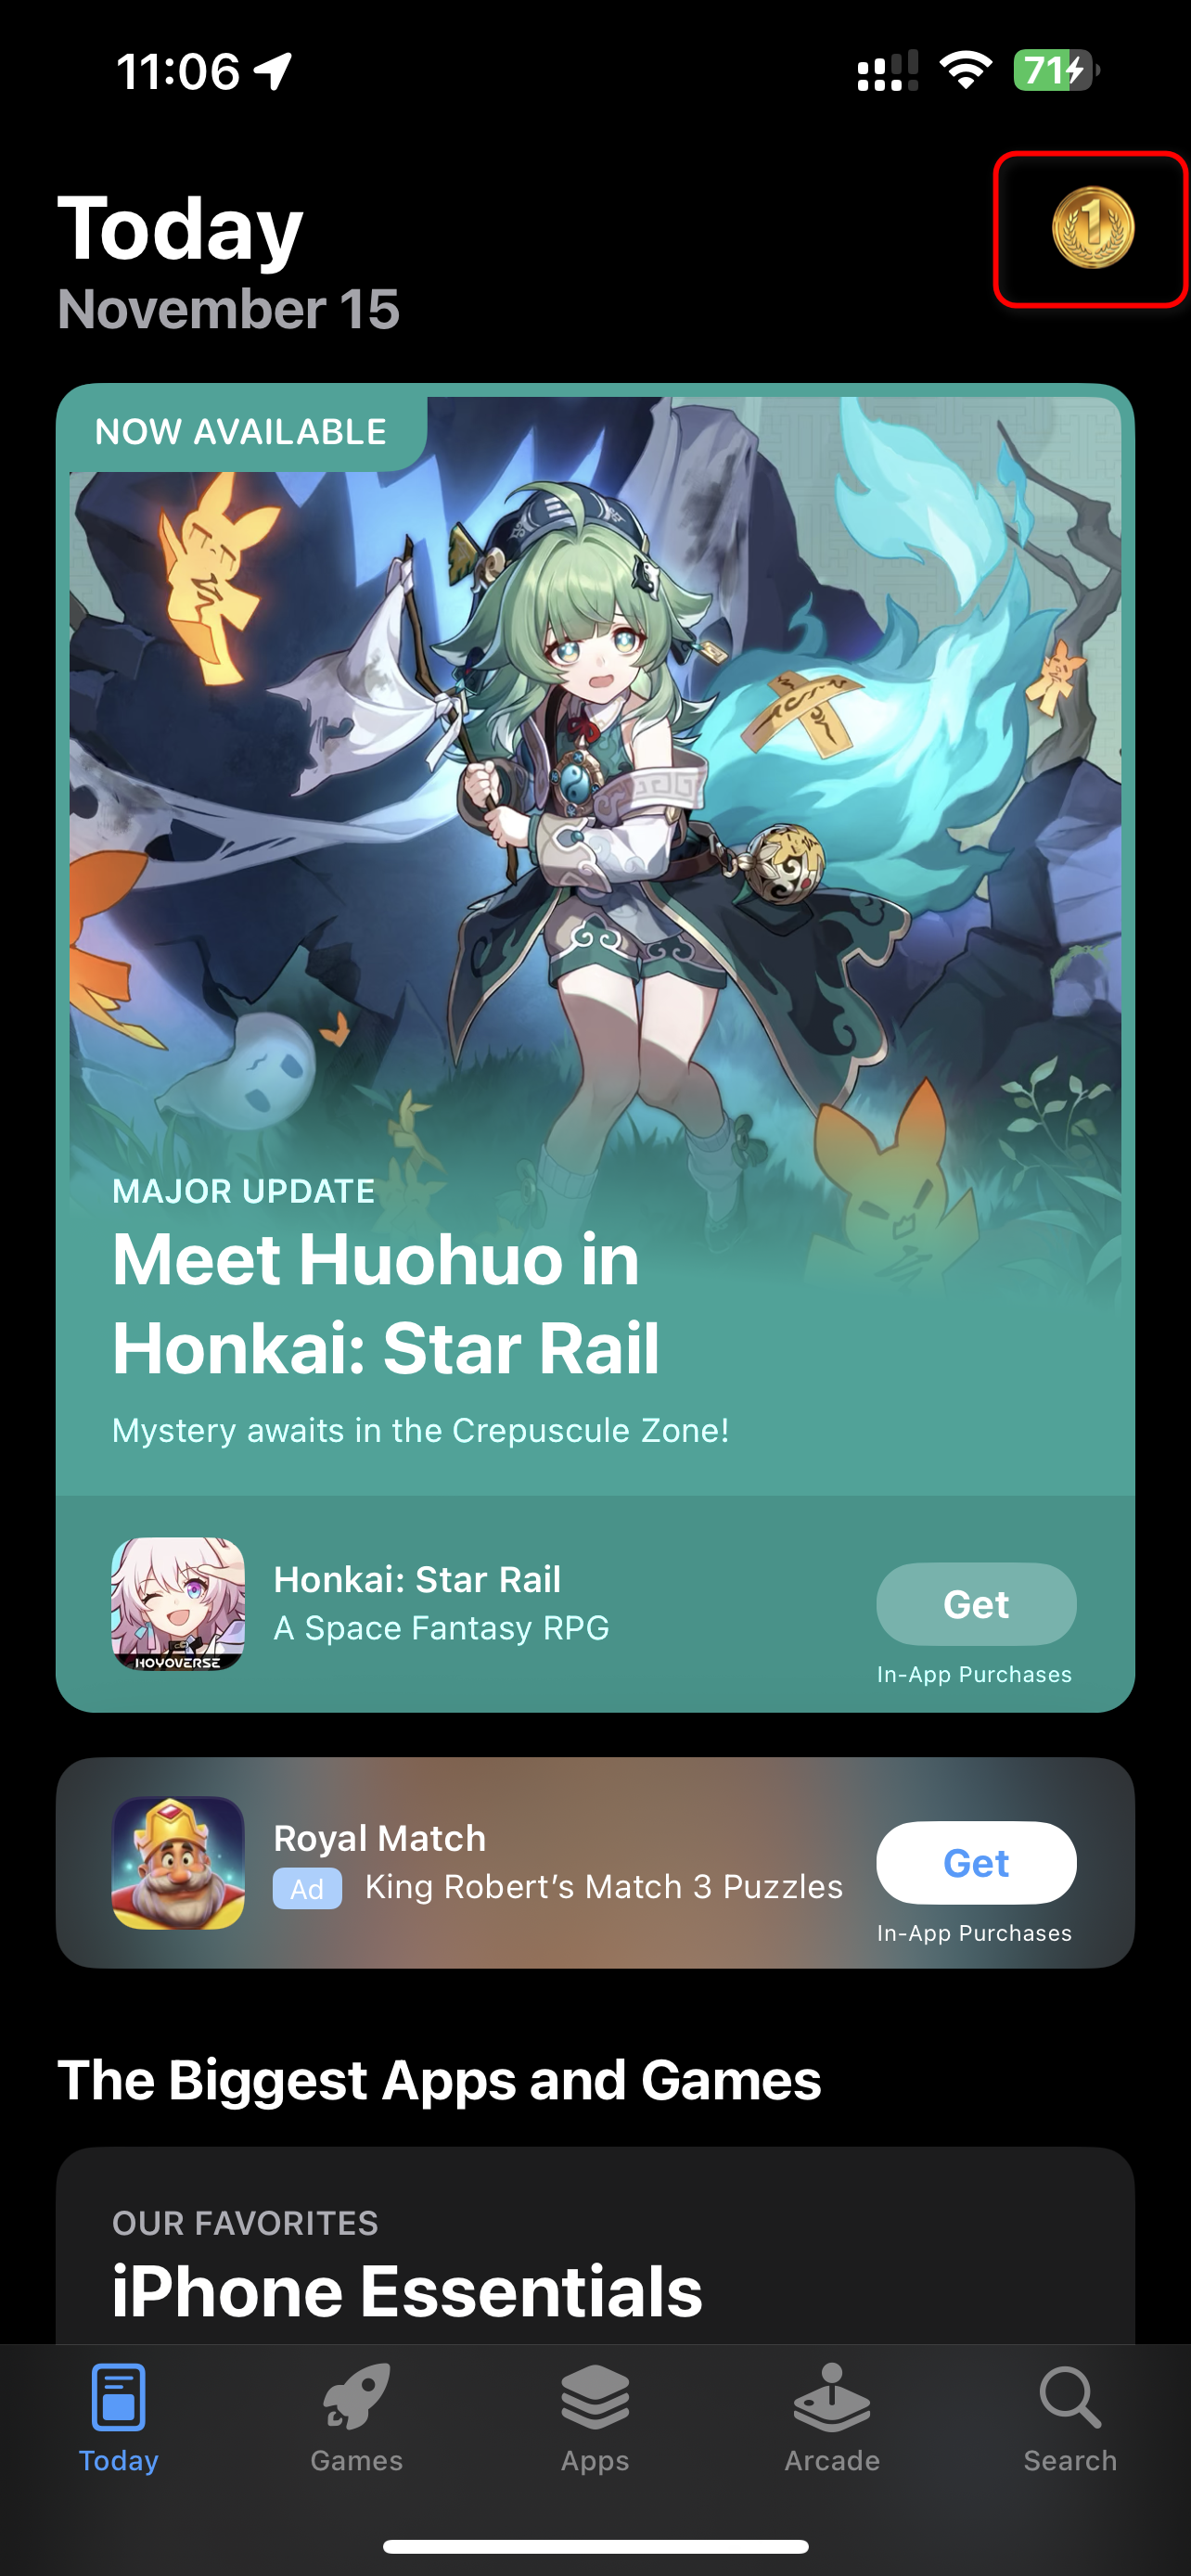
<figure><img src="/files/czI0XI4mAxonlTNLOdzC" alt=""><figcaption><p>Next, choose your profile icon located at the top right of your iPhone.</p></figcaption></figure>

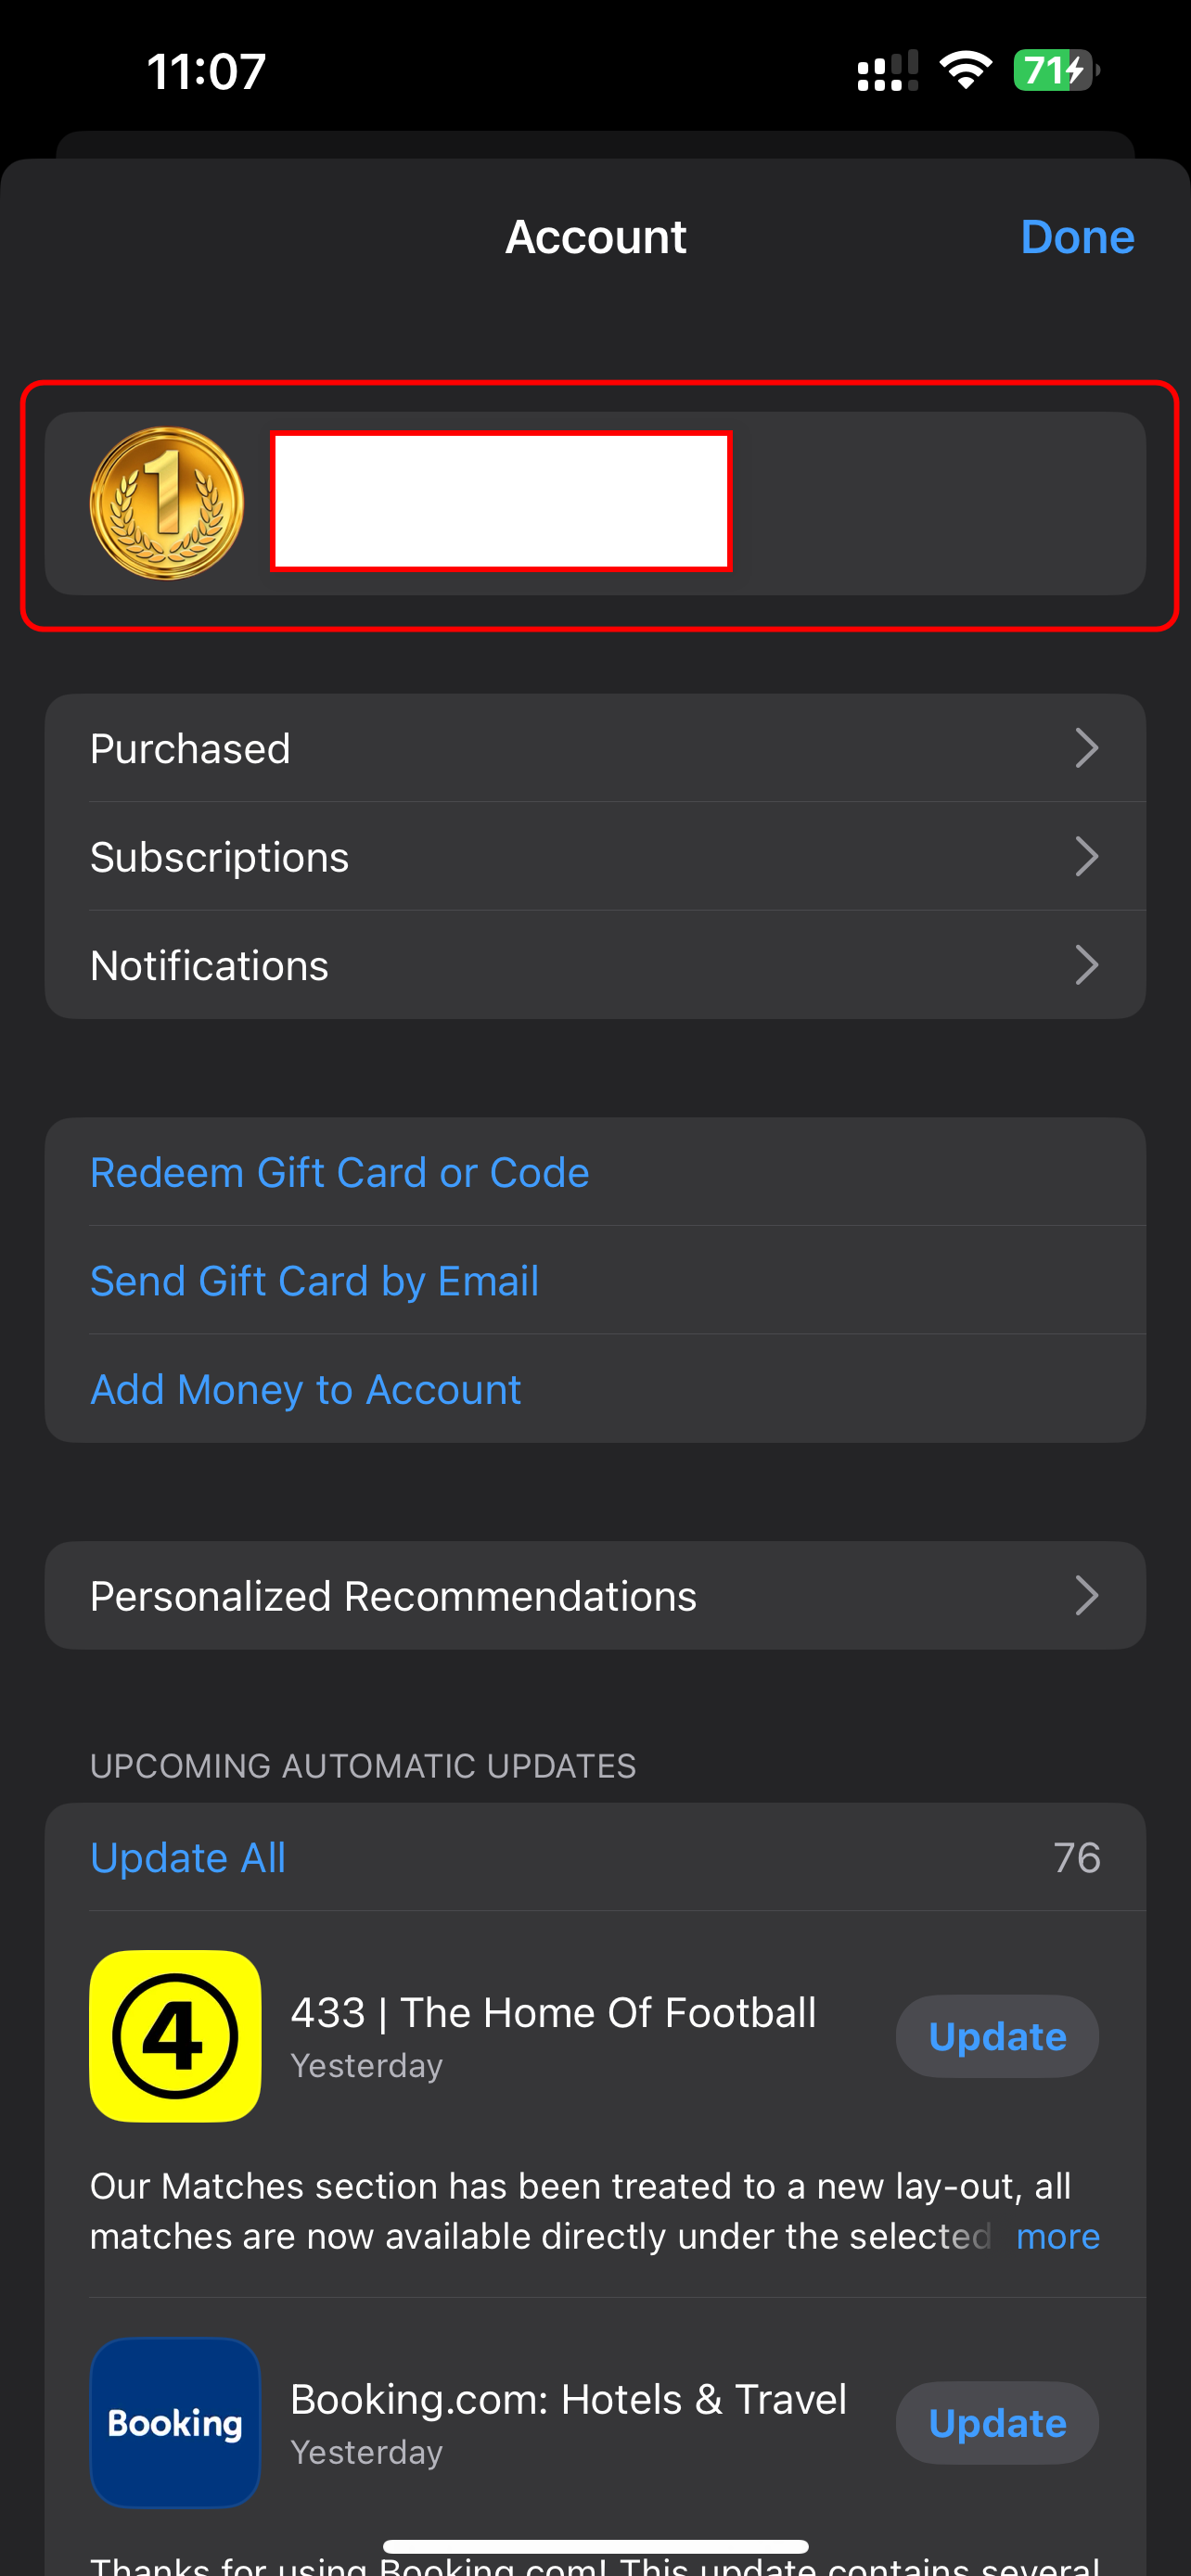
<figure><img src="/files/crkkQz4lkcsQEFPE6mjT" alt=""><figcaption><p>Tap on your Apple ID account.</p></figcaption></figure>

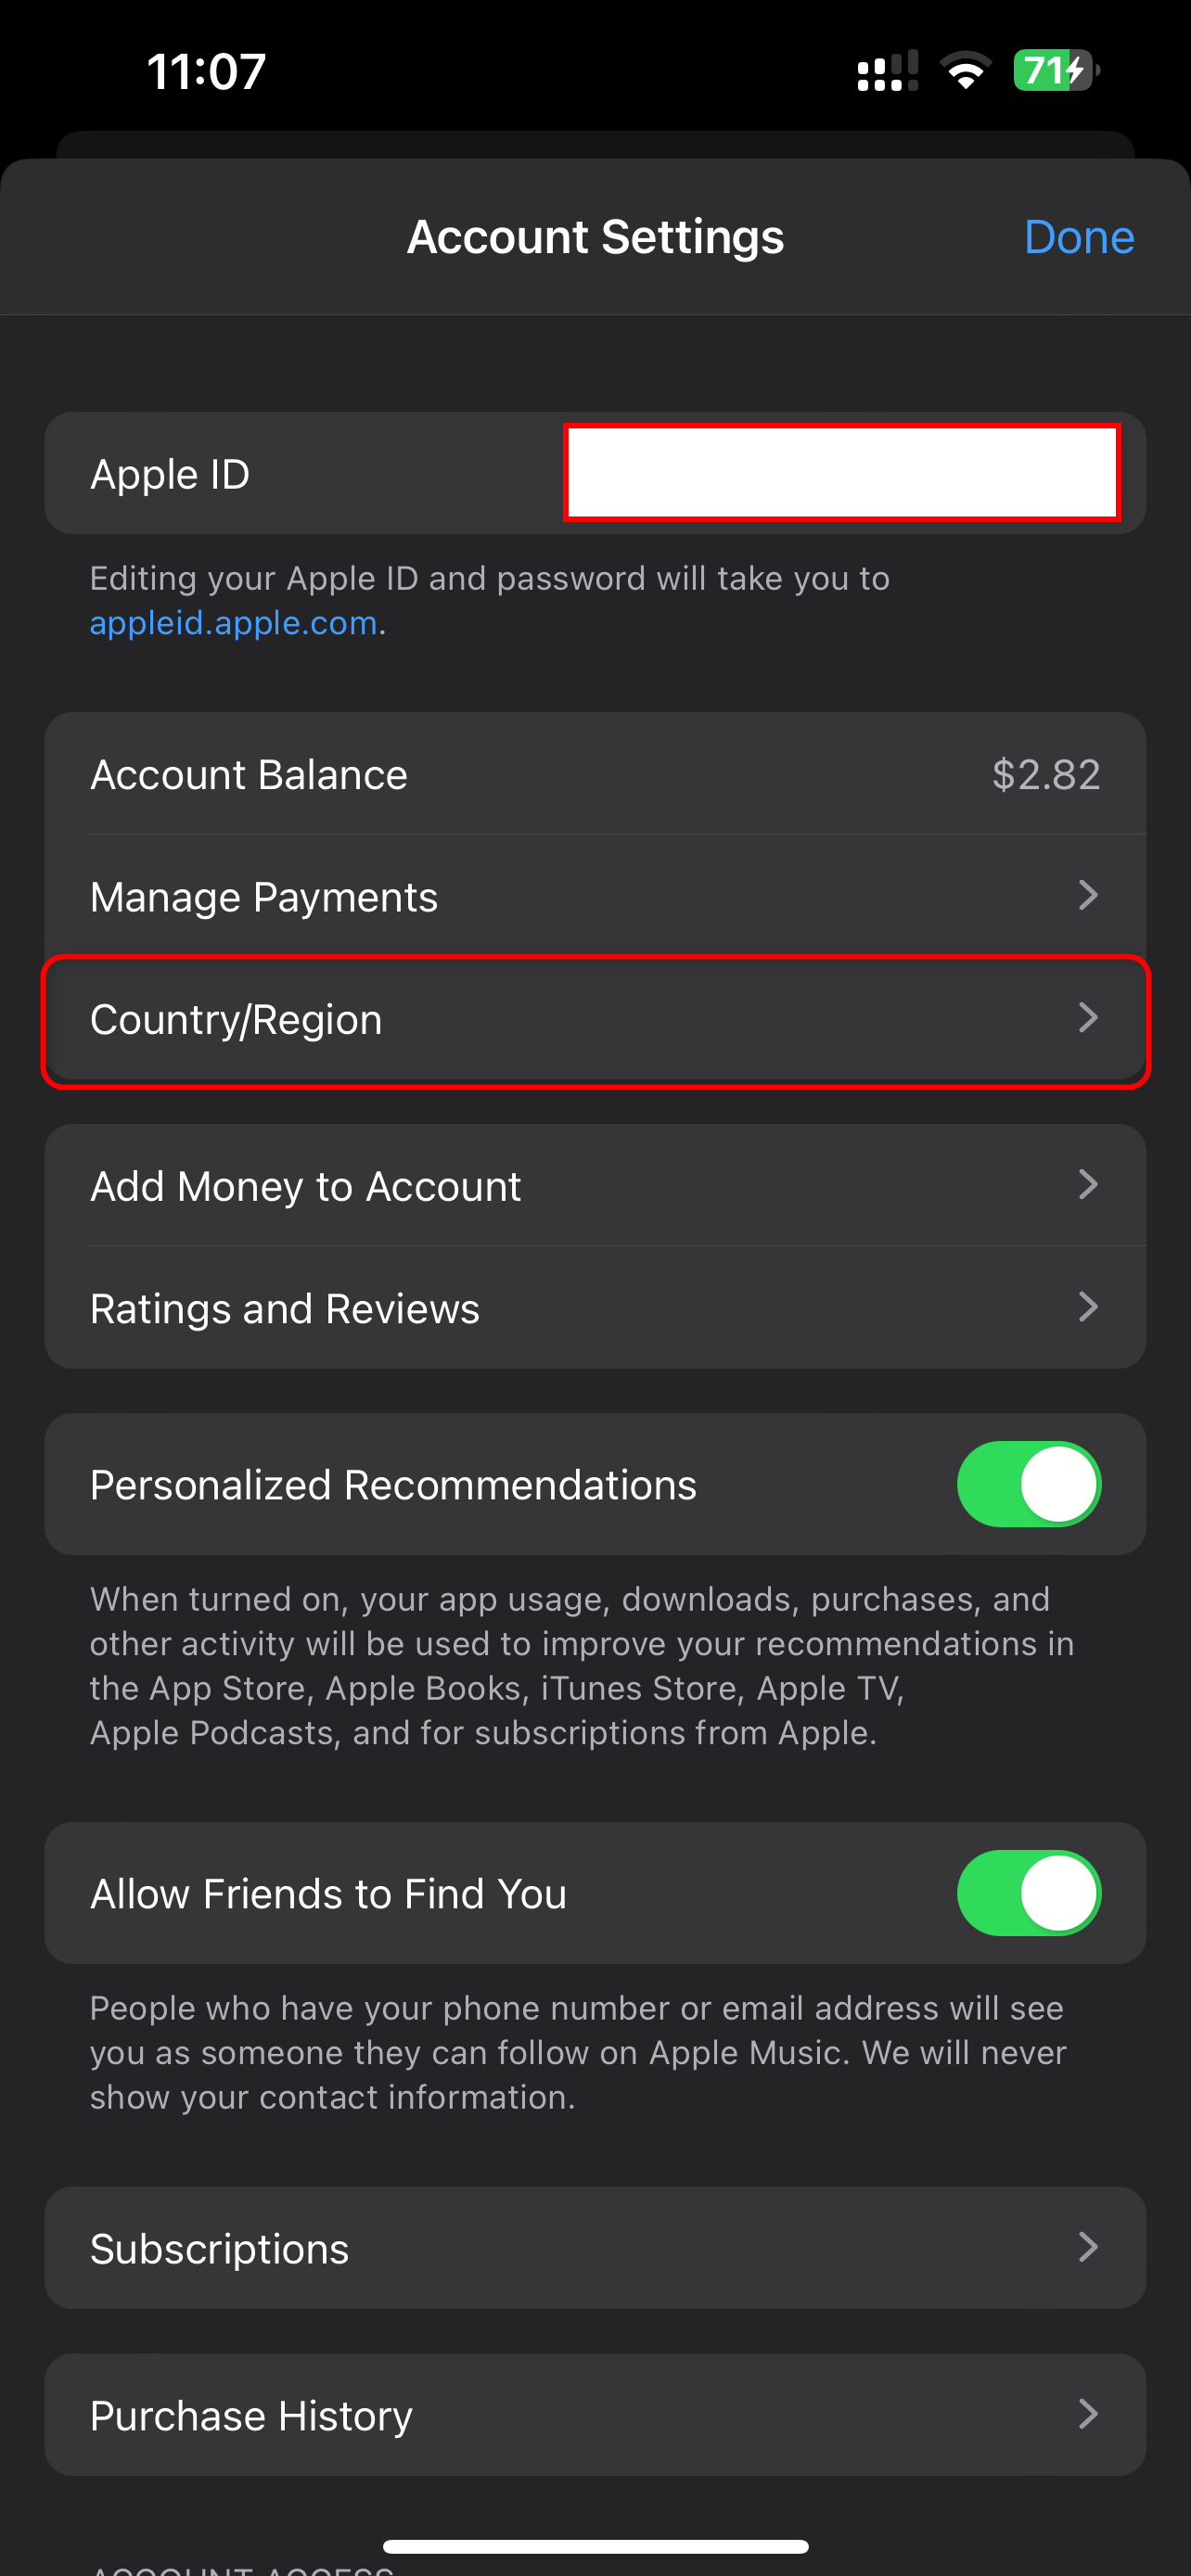
<figure><img src="/files/WQRWRBwgX45oIqWKB7X4" alt=""><figcaption><p>Lastly, tap on the "Country/Region" button. That's it – you'll now be able to change your Apple ID country to any country of your choice.</p></figcaption></figure>

I trust the tutorial above clarified how to effortlessly change your Apple ID region. For any additional explanations, feel free to contact us on Instagram @digitalpurse.io. We're more than happy to assist you.


---

# Agent Instructions: Querying This Documentation

If you need additional information that is not directly available in this page, you can query the documentation dynamically by asking a question.

Perform an HTTP GET request on the current page URL with the `ask` query parameter:

```
GET https://tutorial.digitalpurse.io/iphone-tips-and-tricks/changing-your-apple-region-a-simple-guide.md?ask=<question>
```

The question should be specific, self-contained, and written in natural language.
The response will contain a direct answer to the question and relevant excerpts and sources from the documentation.

Use this mechanism when the answer is not explicitly present in the current page, you need clarification or additional context, or you want to retrieve related documentation sections.